
Shooting & setup guide
Product photography lighting that reveals the product
Reveal shape, texture and color with a lighting setup you can repeat across every product shot.
Good product lighting does more than make an image bright: it makes the material believable, the form easy to read and the important details clear.
This guide shows you how to start with one light, read highlights, shadows and reflections, then make the smallest useful change for matte, glossy, glass or metal products.
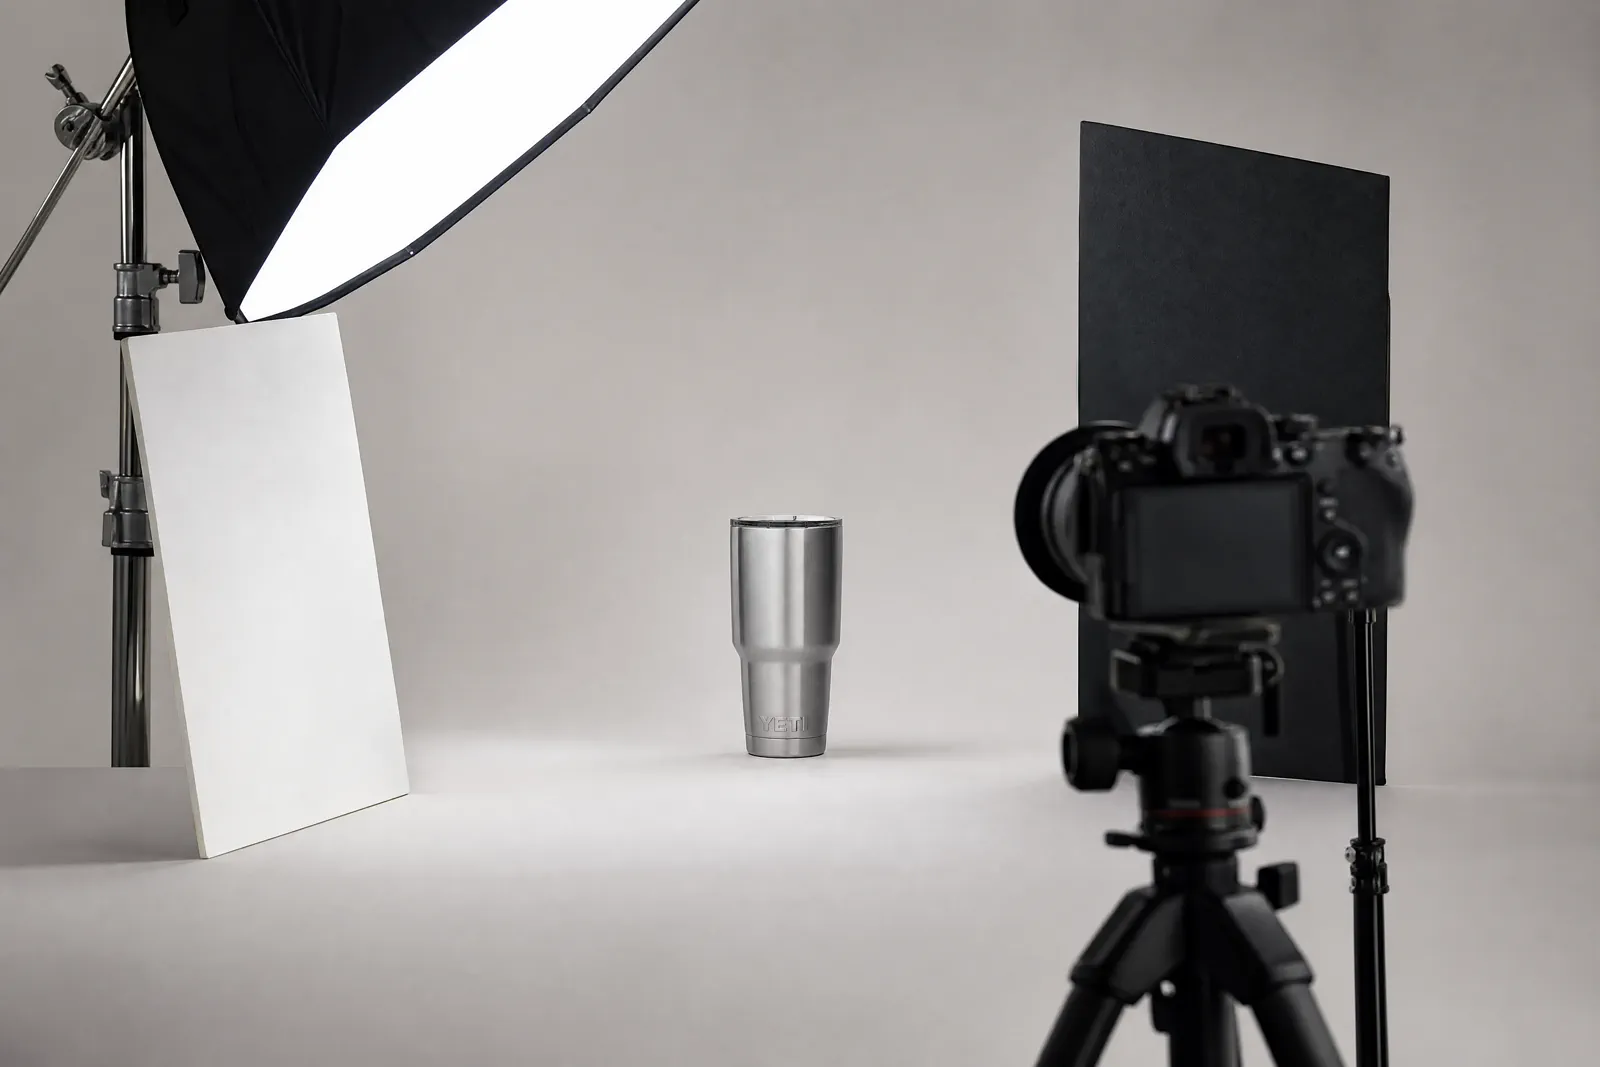
01 · Visual diagnosis
Read the highlight, transition, shadow and reflection
Do not judge a setup by brightness alone. Four visible cues tell you what the light is doing to the product.
Surface
Highlight
The highlight reveals gloss, texture and the apparent size of the source. A small hard source produces a tighter, sharper highlight; a larger diffused source usually produces a broader transition.
- Check whether important texture is clipped.
- Look for a source shape that supports the material.
Form
Transition
The change from light to dark describes the product’s shape. If every surface has the same value, form can disappear even when exposure is technically correct.
- Move the light around the product before adding another light.
- Use fill only where information is genuinely missing.
Separation
Shadow
A contact shadow anchors the product; a cast shadow describes direction and distance. A dark, doubled or misplaced shadow often signals a setup problem rather than an editing problem.
- Check edge softness and direction.
- Confirm that the shadow agrees with the scene.
Environment
Reflection
Glossy products show the room, cards and source around them. For metal, glass and polished packaging, controlling what the product reflects can matter more than increasing output.
- Use white cards to place clean highlights.
- Use black flags to define edges and remove clutter.
02 · Controlled comparison
Keep the key fixed: one light → fill → flag
Keep the product, camera, crop, white balance, key-light position and output treatment fixed. Add fill first, retain it, then add a flag so every frame has one named cause.
Begin with one large, controllable source placed to reveal the product’s most important surface. Capture the baseline before adding anything. If shadow-side detail is missing, bring in a white fill card gradually and record its position.
For the third frame, leave that fill in place and add a black flag where a glossy edge or reflected area needs definition. Comparing the three frames separately shows that fill recovers information while a flag removes spill or creates a controlled dark reflection.
Fill and negative fill are not opposites on a brightness slider. Fill returns information to a dark area. A flag removes spill or creates a darker reflected edge. Use the smallest change that makes the product easier to understand.
Frame A
Key light only
Use this frame to judge direction, highlight shape, form and the natural shadow. It is the reference for every later correction.
Control: product, camera, crop and key light remain fixed
Frame B
Add fill for missing shadow detail
Add one white fill card without moving the product, camera or key light. Confirm that the required detail returns without flattening the product, then record the card’s position and distance.
Changed variable: fill card added
Frame C
Retain the fill and add a flag
Keep Frame B unchanged and add one black flag to control spill or define a reflected edge. Confirm that the reflection improves without losing the detail recovered by the fill.
Changed variable: black flag added; fill remains fixed
This interaction explains the comparison logic. Real exposure and material conclusions still require a fixed-condition capture test.
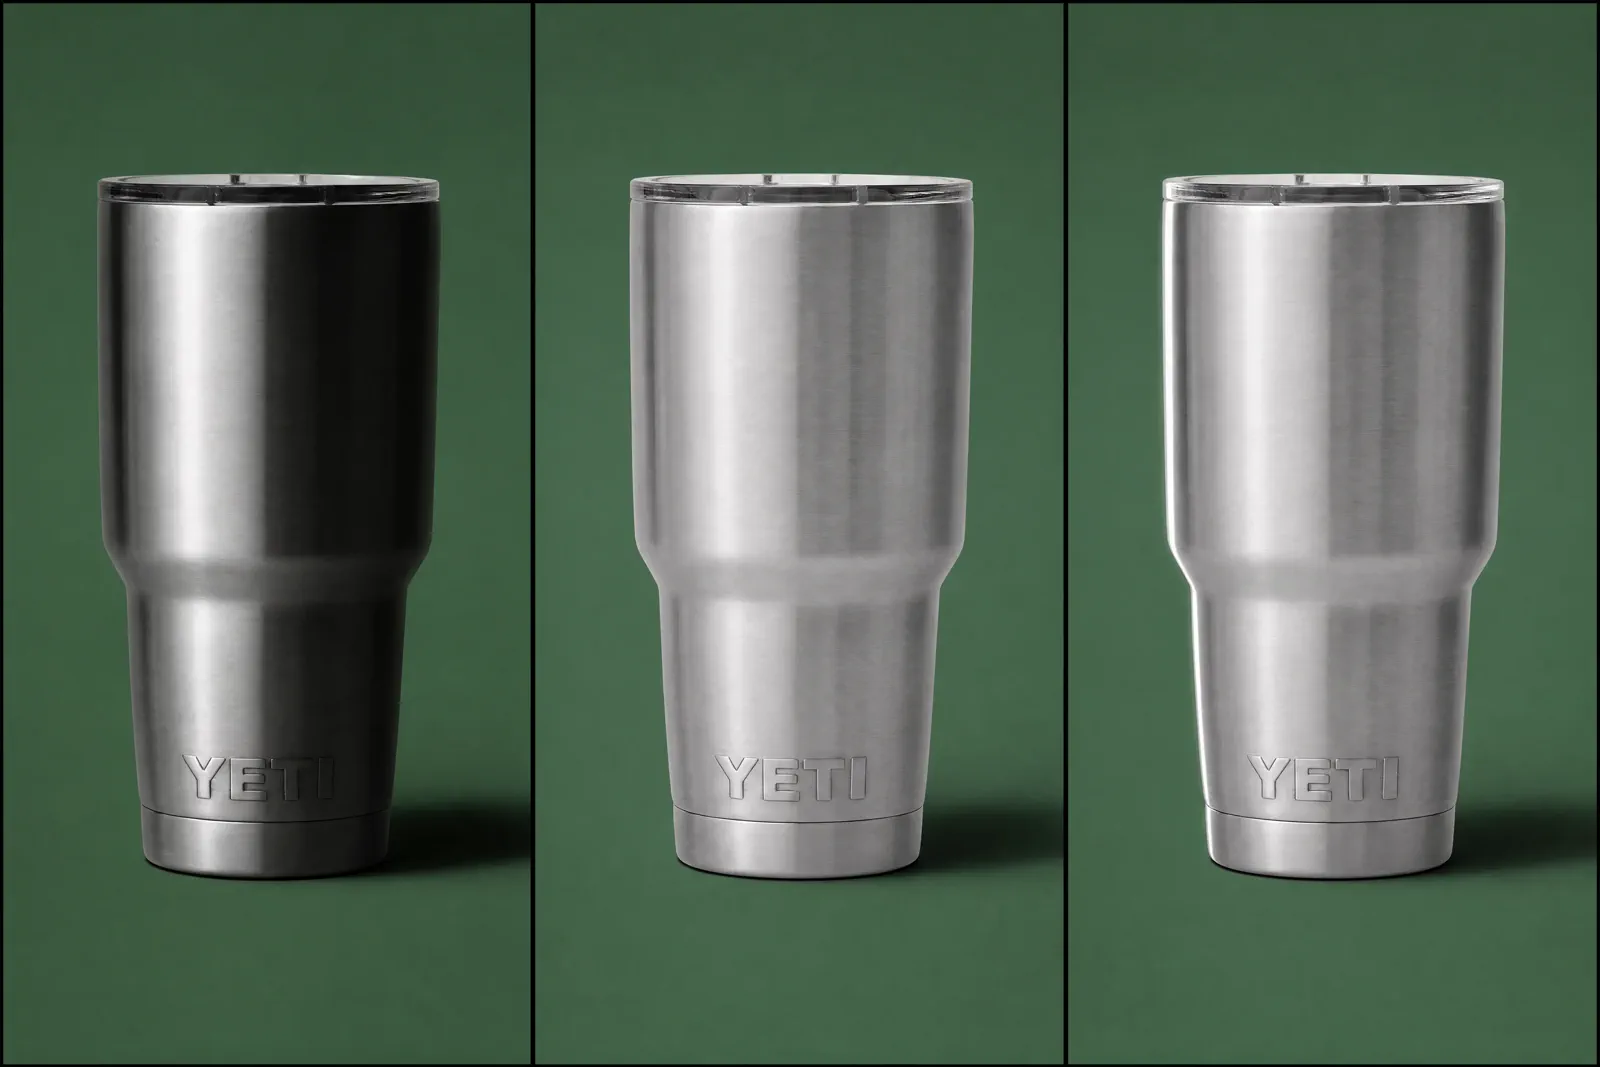
Keep the product, camera, crop, and key light fixed so each added control has a visible, repeatable effect.
03 · Source decision
Choose light by control, not by a universal best setup
Window light, continuous light, flash, ring lights and light boxes can all fit specific jobs. Choose the approach that lets you repeat the result within the product, material, motion and production constraints.
| Approach | Useful when | Watch for | First control to add |
|---|---|---|---|
| Window light | The product is stationary and the session can follow stable daylight. | Intensity, direction and color may change during the shoot. | Diffusion, a reflector and a fixed product position. |
| Continuous light | You need to see the highlight and shadow while adjusting the setup. | Mixed room light, limited output or heat from some fixtures. | Turn off competing sources and set a consistent white balance. |
| Flash or strobe | You need repeatable output, motion control or more power. | The final effect is not visible until capture and modifiers still determine quality. | Test at low complexity: one source, one modifier and a stable camera. |
| Ring light | A centered, frontal source suits the product and a circular reflection is acceptable. | The result can flatten form, create a prominent ring reflection or be difficult to scale to larger products. | Compare it with an off-axis source on the same product before choosing it. |
| Light tent or light box | Small reflective products need broad surrounding diffusion and a repeatable enclosure. | Limited working space, flat form, visible openings and constrained camera angles. | Test edge definition and reflections; transfer purchase decisions to Equipment. |
The source category does not decide softness by itself. Apparent source size, distance, diffusion and product scale all shape the result.
04 · Material response
Change the setup when the material changes
The same light can describe matte, reflective and transparent products very differently. Let the material determine what you control.
Matte
Reveal shape without flattening texture
Use directional light to create a readable transition across the form. Add fill carefully: too much can remove the small tonal changes that make texture visible.
- Check texture at full size.
- Move the source before increasing fill.
- Watch for uneven color across broad surfaces.
Reflective
Design the reflected environment
A polished object reflects cards, sources and the room. Use large clean cards to build highlight shapes and black flags to create controlled edges.
- Remove bright clutter outside the frame.
- Judge the shape of reflections, not only exposure.
- Check labels and metallic edges separately.
Transparent
Create edge contrast and controlled glow
Glass and clear packaging often need edge definition rather than direct front brightness. Test backlight, rim light or a contrasting background while protecting label detail.
- Inspect both edges against the background.
- Check liquid and label color independently.
- Keep doubled reflections from competing with the product.
05 · Troubleshooting
Match the visible failure to the next test
Do not correct every problem by adding light. Use a diagnosis that tells you what to change and how to confirm the fix.
01Hard transitionThe shadow is harsher than the product needs
Increase the apparent source size, move diffusion closer to the product or reduce the source-to-product distance while monitoring spill. Confirm the fix by comparing the transition and contact shadow.
- Keep exposure comparable between tests.
- Do not erase the contact shadow completely.
02Low separationThe product looks flat
Reduce fill, change the key-light angle or add negative fill where the contour needs a darker reflected edge. Confirm that important form returns without hiding label detail.
03Lost detailHighlights clip or dark areas close up
Check camera exposure first, then change source placement, diffusion or fill. A brighter edit cannot recover important texture that was not captured.
04Color mismatchThe product has a color cast
Remove mixed light, match sources, set white balance for the actual setup and compare against a trusted reference. Recheck reflective surroundings that may tint the product.
05Multiple directionsThe product has double shadows
Identify each active source, including room light. Turn sources off one at a time, then rebuild the setup around one dominant direction.
06Gloss problemAn unwanted reflection crosses the product
Move or reshape what the product reflects: the source, card, flag, camera opening or surrounding room. Increasing brightness rarely removes a reflected object.
06 · Repeatability
Record the setup and approve the source at full size
A successful test becomes useful production evidence only when another person can repeat it and the source file survives a detailed review.
Record physical positions
Photograph the set from above and the side. Record source, modifier, product and camera distances, plus card or flag positions.
Record capture decisions
Save exposure, white balance, focal length, focus method and file format with the approved frame.
Review the product truth
Inspect label text, highlight detail, edges, color, texture, contact shadow and reflections at full size—not only in a small preview.
Review the output role
Confirm that the crop, background and negative space suit the intended placement before creating variations.
Questions that need judgment
Frequently asked questions
These answers cover the exceptions and review tests that still depend on context.
Why does a white background look gray even when the product is exposed well?
Product exposure and background exposure are separate decisions. Check the product-to-background distance, light spill, whether the background has its own illumination, the background material or tone, and the camera exposure before editing. A white background can reproduce as gray when it receives less light than the product. Do not add light blindly: confirm that the product remains correctly exposed and that edge separation is preserved.
What should I change first for a reflective or transparent product?
For glossy metal or polished packaging, change the reflected environment first: source size and position, white cards, black flags and bright room clutter. For glass or other transparent products, test edge contrast, rim or backlight, and the background relationship while protecting label detail. Keep the camera and product fixed and change one variable at a time so the improvement is visible.
When is one exposure no longer enough?
One exposure may be insufficient when important highlights and shadows cannot fit within the captured range, or when the product depth cannot be acceptably sharp in one focus plane. Before bracketing or focus stacking, stabilize the camera, product and light and confirm that exposure or depth—not focus error or movement—is the real constraint. Multi-frame methods add alignment and editing work, so use them only when a controlled comparison proves the need.
Do not relight every idea
Turn one well-lit source into many selling scenes
Keep the photo with clean color, edges, labels, and reflections. Let Adyvi change the background, mood, and composition for product pages, lifestyle content, and campaigns—without rebuilding the lighting.
Create my next selling scene