
Shooting & setup guide
How to take product photos with an iPhone
Take sharper, more consistent iPhone product photos by fixing light, distance and stability before you touch the edit.
A strong phone photo starts with a clean lens, stable support, soft consistent light and enough distance to keep the product’s shape believable.
Follow this repeatable capture sequence to control focus, exposure, framing and product shape, then choose a source photo that gives you room to edit, crop or build a new scene.
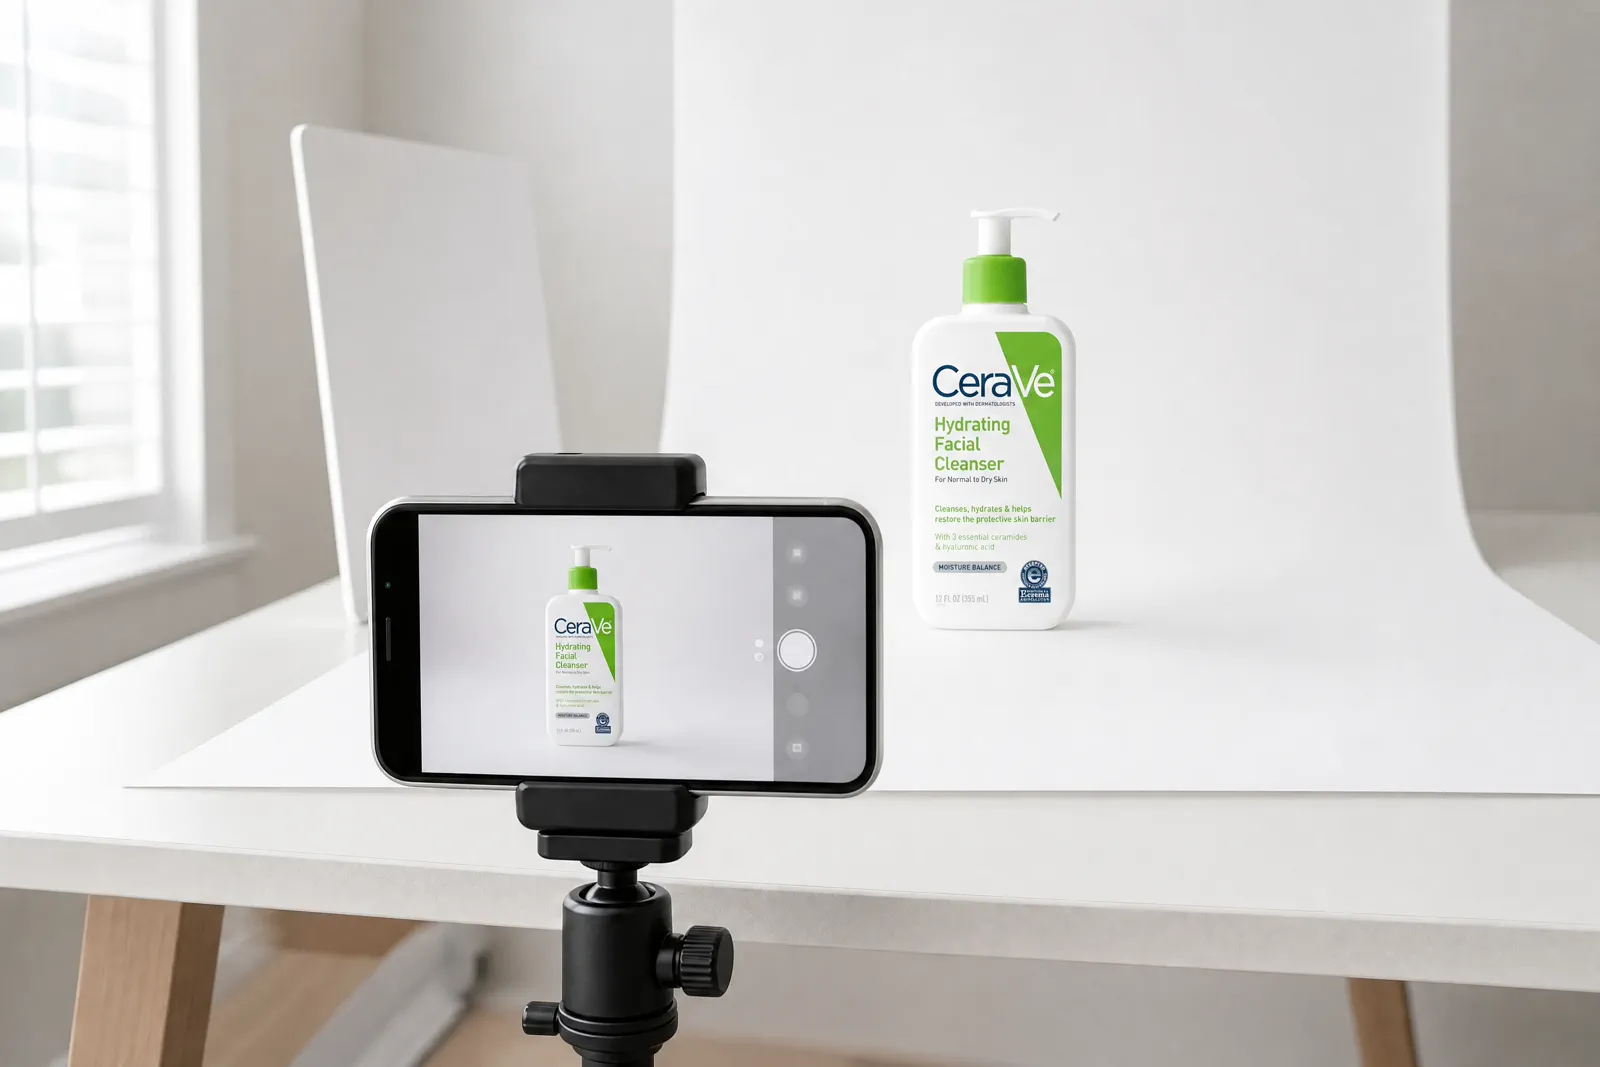
01 · Before capture
Prepare the source before opening the camera
Most phone-camera problems are easier to prevent in the set than to repair later.
Clean the lens and product
Remove fingerprints, dust and packaging debris. Recheck glossy surfaces after every reposition because small marks become visible in highlights.
Stabilize the phone
Use a tripod, clamp or stable support that does not block controls or create vibration. Mark the phone and product positions for repeatable views.
Control one soft light direction
Remove mixed room light, establish a repeatable source and use cards or flags to shape important detail and reflections.
Plan the final crops
Leave enough room for every required placement and keep the phone position consistent. Do not rely on a later crop to correct severe perspective distortion.
Choose the required product view
Decide which label, feature, surface or scale relationship the image must prove. This determines focus, angle and review priority.
Check the controls on your own iPhone
Camera controls vary with the iPhone model, iOS version, and shooting mode. Before the session, confirm whether your phone offers focus and exposure control, grid, level, timer, and lens choices.
02 · Capture worksheet
Use a repeatable phone capture sequence
Follow the same sequence for every product. Use only controls available on the current phone and camera mode, and save the completed worksheet with the approved source.
0 items selected for the next test or capture record.
03 · Shape and framing
Protect product shape with distance and deliberate framing
A close phone position can exaggerate the nearest part of the product. The exact camera options vary, so use a visual test rather than a model-specific rule.
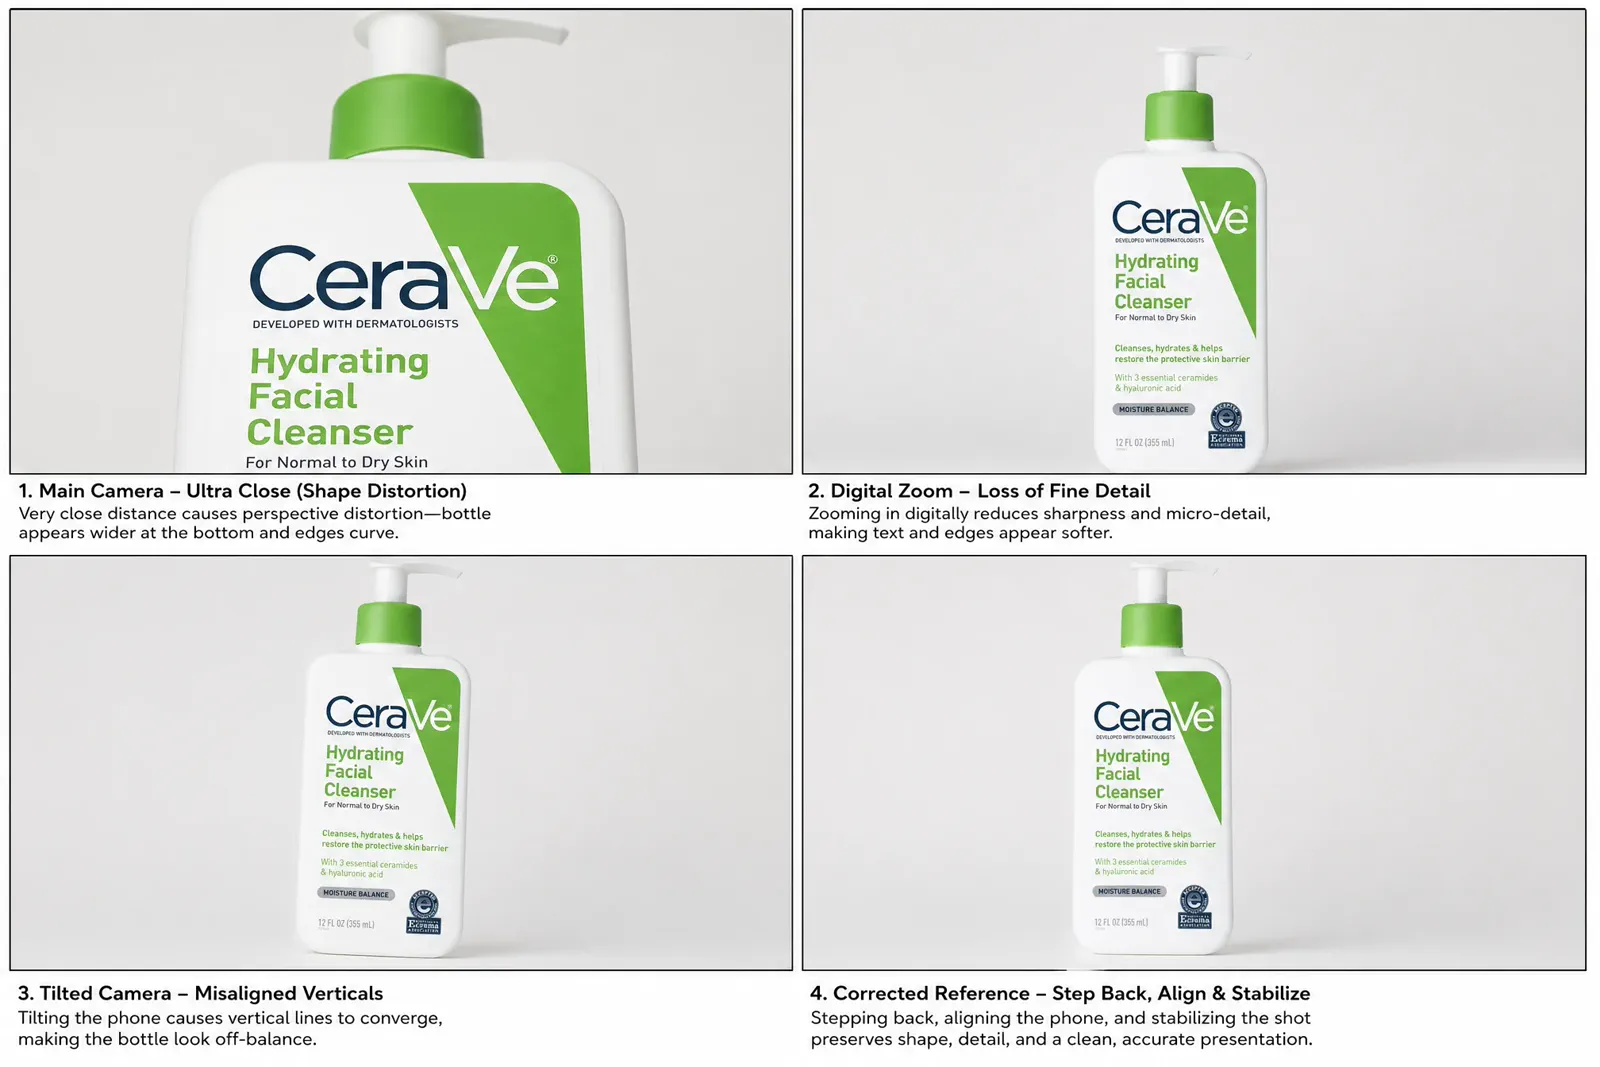
01Shape looks exaggeratedMove back before changing anything else
Increase camera-to-product distance, keep the camera aligned and reframe using an available optical view or a modest later crop. Compare front and rear proportions.
02Product is too small in frameImprove the set before relying on digital zoom
Move the product and support within the safe working distance or use an available camera view that preserves detail. Digital zoom or heavy cropping can discard useful pixels.
03Edges convergeCheck camera alignment and height
Align the phone with the intended product plane and use a level when available. Confirm verticals, circles and package faces before capture.
04Close detail is requiredTest the minimum usable distance
Move closer only until focus, depth, reflection control and product shape still pass review. If an available close-up mode changes behavior, compare it with a standard view before approval.
04 · Coverage plan
Capture a shot list that answers product questions
A repeatable source set is more useful than many near-duplicate frames. Assign each image one job.
Identity
Primary product view
Show the complete product with a clear silhouette, accurate color, readable label and useful crop room.
Decision detail
Feature or material close-up
Show the texture, closure, control, finish or construction detail a shopper needs to evaluate.
Scale
Size relationship
Use a hand, model, familiar reference or measured graphic only when the relationship is accurate and included items remain clear.
Use
Context frame
Show a relevant use state without inventing performance, compatibility or included accessories.
Coverage
Rear, side or packaging view
Capture the information hidden in the main view, including ports, ingredients, care, dimensions or packaging when relevant.
Placement
Negative-space variant
Capture a version that protects product scale while leaving intentional space for the approved message and required crop.
05 · Troubleshooting
Diagnose the source before applying a stronger edit
Review the original file and confirm one failure at a time. A polished edit cannot restore product information that was never captured.
01Soft edgesBlur or missed focus
Stabilize the phone and product, use a timer when available, clean the lens and compare the actual focus plane. Check whether movement or insufficient depth—not editing—is the cause.
02Frame-to-frame changeInconsistent exposure or focus
Keep composition and light fixed. Use focus or exposure lock when available, or reset the focus and exposure deliberately for every frame and document the sequence.
03Bright detail disappearsClipped highlights
Reduce exposure or reshape the light and reflections before capture. Compare the label, metallic edge and pale surface in the original file.
04Shape feels wrongPerspective distortion
Move farther away, align the phone and reframe. Do not treat a geometry correction as permission to begin with an extreme camera position.
05Product color shiftsMixed light or reflected color
Remove competing light sources and colored surroundings, then compare against a trusted reference. Recheck automatic adjustments after the composition changes.
06Texture looks brittleOverprocessed sharpness
Compare the original with the edited version at full size and output size. Reduce sharpening, noise reduction or local contrast and recheck fine texture, halos and label edges.
06 · Source approval
Approve the original before handing it to editing or generation
The source record should show what was captured, what was checked and which changes are safe downstream.
Product identity
Confirm shape, color, label, logo, controls, openings and all decision-making details against the real product.
Technical quality
Inspect focus, edge detail, highlights, noise, color consistency, reflections and contact at full size.
Crop resilience
Test required aspect ratios and product prominence. Preserve enough source area for the placements that will actually be produced.
Original file
Keep the unedited original, final edit, capture date, device and software version, and setup notes together.
Safe downstream changes
State what may change—such as background or supporting context—and what must remain fixed, including label, shape, color and included components.
Delivery test
Export the real target size and review it on a representative screen or placement before approving the workflow.
Non-destructive handoff
Preserve the original, create clearly named crop or export copies, record the intended destination and avoid overwriting the approved source during transfer.
Questions that need judgment
Frequently asked questions
These answers cover the exceptions and review tests that still depend on context.
How do I know whether an iPhone source photo is good enough to use?
Review the original at full size and at the required delivery size. The required product detail should be sharp, edges should be clean, color and label content should match the real product, reflections should be controlled, noise should not remove important texture, and the source should have enough crop room for the intended placements. A phone photo is good enough when it passes the image’s evidence and output requirements—not simply because it looks clear on the phone screen.
Should I avoid Portrait mode or digital zoom for product photos?
Use caution rather than a universal ban. A depth effect can create masking errors around transparent, reflective or fine edges, and digital zoom can discard useful detail. Compare the mode result with a standard capture at full size, especially around product edges and labels. When possible, improve camera distance, support and framing first, then use a modest crop. Exact options and behavior vary by device, software version and camera mode.
Why can an iPhone photo look overprocessed or unnaturally sharp?
Strong sharpening, noise reduction, local contrast, highlight processing or later editing can create brittle texture, halos and unnatural label edges. Mixed light can also make correction more aggressive. Compare the original and edited file at full size and at output size, reduce one processing variable at a time, and judge the product detail rather than the overall punch of the preview.
Your phone shot can go much further
Turn an iPhone product photo into a commercial-ready visual
No studio, professional camera, or complex settings required. Upload your clearest iPhone photo and create a product-page image, lifestyle scene, or ad direction in Adyvi.
Upgrade my iPhone product photo