
Shooting & setup guide
Choose the right product photography background
Choose a background that keeps the product unmistakable and gives every image the right mood, context and crop flexibility.
White, brand color, texture and lifestyle settings each solve a different image problem. The best choice keeps edges clear while helping the shopper understand the product or feel the intended story.
This guide compares those directions with the same product and shows how to judge contrast, color cast, texture scale, perspective, contact shadow and crop.
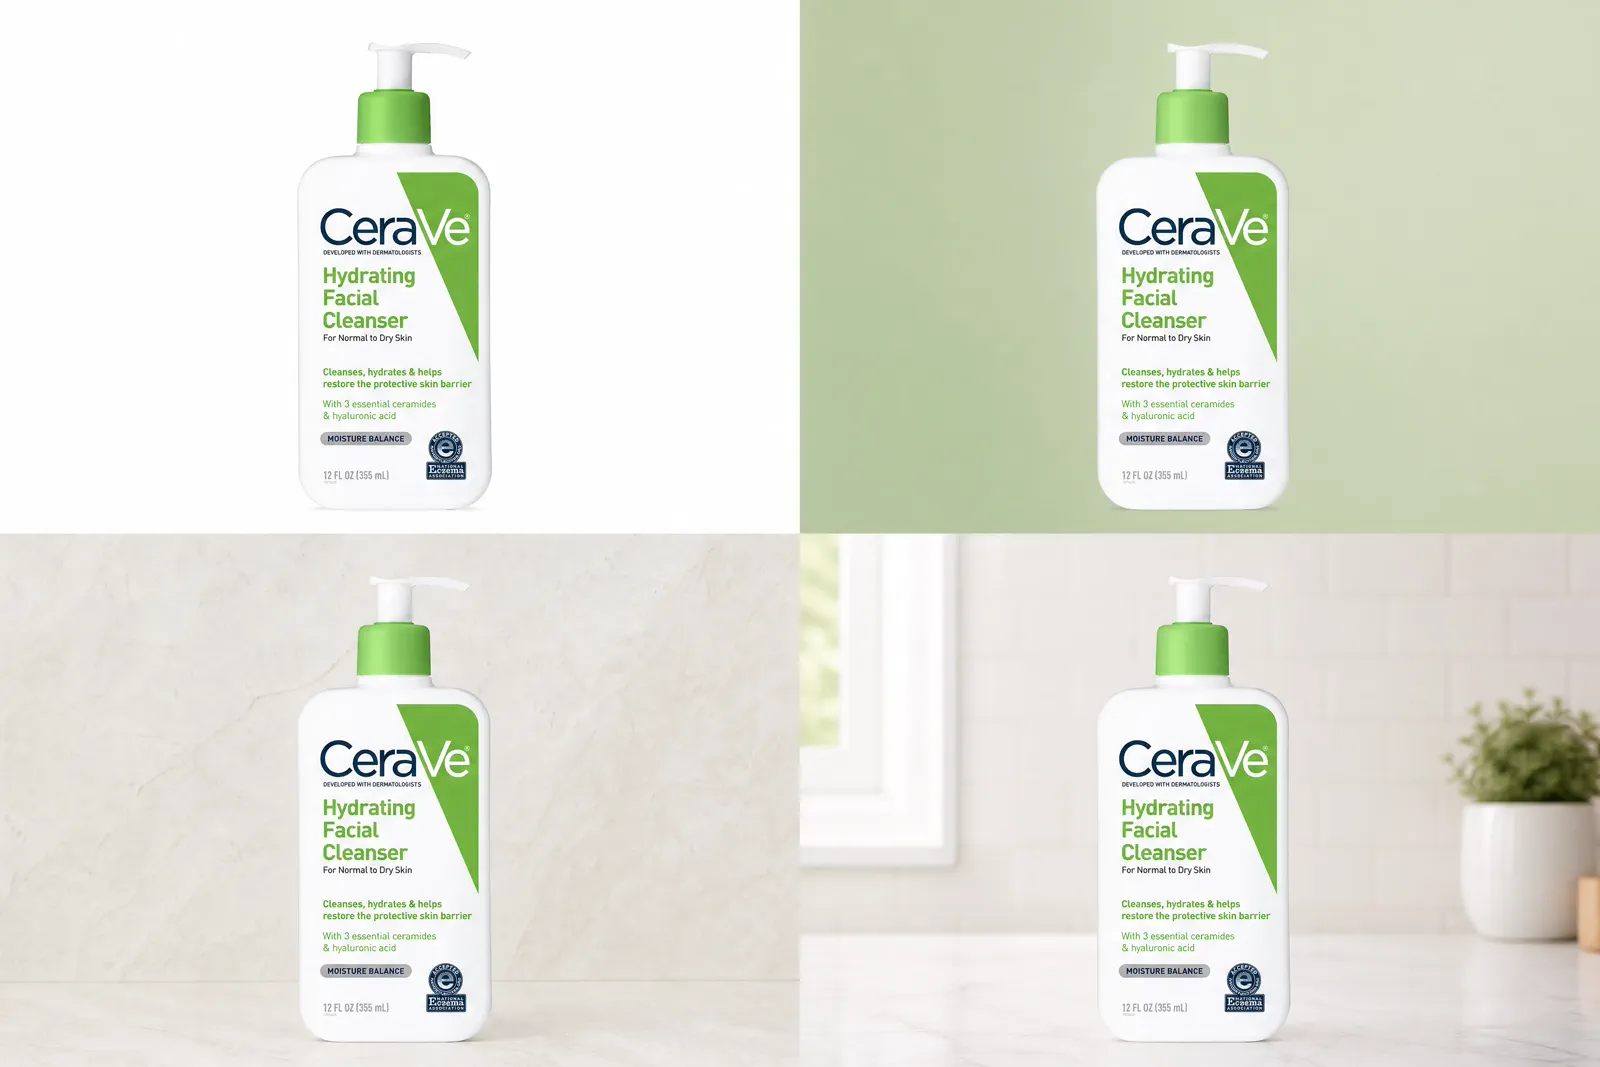
01 · Controlled experiment
Compare backgrounds while the image job stays fixed
To learn what a background changes, keep the product, source image, image role, placement, crop and output method constant. Change only the background.
Use one approved product source and one defined placement. Create a clean white version, a brand-color version, a scaled texture and a contextual scene. Review the same product edges, label, color, contact, negative space and crop in every result.
This comparison can identify the best direction for that fixed use. It does not prove that one background type is best across marketplace main images, catalog pages, campaign banners and social placements.
White or neutral
Prioritize identification and comparison
Useful when accurate product reading and clean separation matter. Check white-on-white edges, grounding and whether the result has enough tonal distinction.
Brand color
Add a recognizable visual system
Useful when the color supports the brand and the product remains easy to read. Check color cast, contrast and whether multiple products still feel consistent.
Scaled texture
Add material information without false scale
Useful when texture supports the product story. Check grain size, surface direction, contact, reflections and whether the implied scale is believable.
Contextual scene
Explain use or mood
Useful when the environment adds relevant use information. Check perspective, light direction, product contact and whether the context makes an unsupported claim.
02 · Image role
Match the background to where the image will work
This matrix compares different uses, so it is a planning tool—not a single-variable experiment.
| Image role | Background priority | Key checks | Next owner |
|---|---|---|---|
| Marketplace main image | Product identification and current platform compliance. | Edge separation, crop, product occupancy and current category rules. | Verify the relevant platform guide before publishing. |
| Catalog or collection | Consistency across the complete product set. | Shared tone, crop, horizon, contact and color handling. | Create a catalog background specification. |
| Product detail page | A useful mix of identity, feature evidence and context. | Image order, label readability, feature visibility and scene truth. | Assign each frame one communication job. |
| Brand or campaign | Mood, recognition and space for the message. | Brand color, typography space, crop variants and product prominence. | Test every required placement separately. |
Platform requirements change. Refer to the current official platform guidance for any rule or size claim.
03 · Background selector
Choose from product separation, image job and production limits
Work through these inputs before browsing attractive scenes. Use the worksheet to record the decision criteria and the background direction that advances to testing.
01Input 1What must this image do?
Choose one primary role: identify the product, explain a feature, show use or scale, create brand mood, or support a campaign message.
02Input 2How easily do the product edges separate?
Compare product color and value against the background. Flag transparent edges, pale-on-pale areas, dark-on-dark contours and fine reflective details.
03Input 3What does the material reflect or transmit?
Gloss, metal and glass can pick up background color, horizon lines and bright objects. Decide whether the background must also act as a reflection environment.
04Input 4What must remain consistent?
Define crop, product scale, horizon, contact shadow, brand palette and the number of products or placements that must use the system.
05Input 5What are the physical and editing constraints?
List available surfaces, set size, repeatability, transparent-material risk, retouching time and the required number of scene variations.
06Input 6Which crops must the source survive?
Test the required aspect ratios and safe areas before approval. A background direction is incomplete when it works in only one unplanned crop.
Switch the frame to inspect subject and crop safety
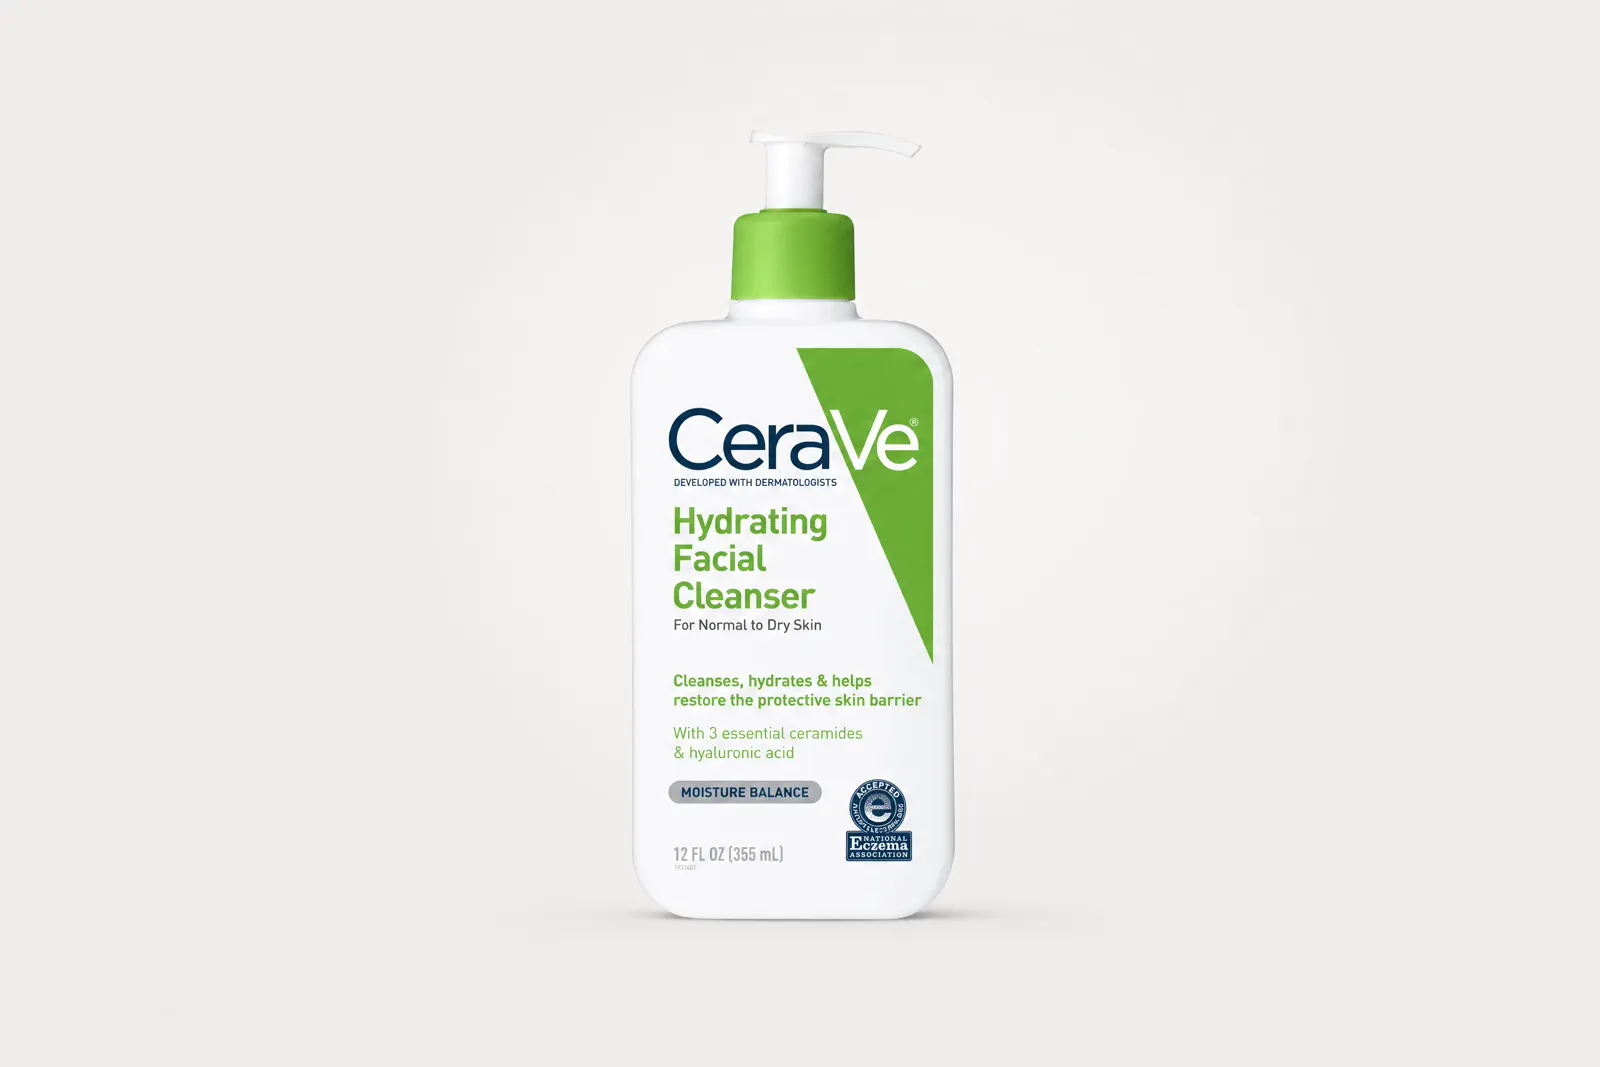 Central safe area
Keep the product source fixed while the frame changes; inspect the pump, label, base, and surrounding safe space.
04 · Difficult products
Protect edges, color and material truth
Background choice becomes a product-rendering decision when the product is pale, dark, transparent or reflective.
Pale on pale
Separate a white product from a white background
Create edge definition with light direction, a slight tonal difference, controlled shadow or reflected dark edges. Do not force product and background to the same white value.
Dark on dark
Preserve contour without washing out black
Use a lighter or reflected edge where form requires it. Review shadow detail and color neutrality so lifted blacks do not become gray or tinted.
Transparent
Use the background to define the edge
Test rim contrast, background transitions and transmitted color. Protect the label and any liquid color independently from the transparent contour.
Reflective
Treat the background as part of the reflection
Check horizon lines, colored spill, bright openings and contact reflections. A clean cutout cannot fix an inconsistent reflected environment.
05 · Scene construction
Keep scale, perspective, light and contact in one visual world
A background feels false when its geometry and light disagree with the product, even if the product edge is clean.
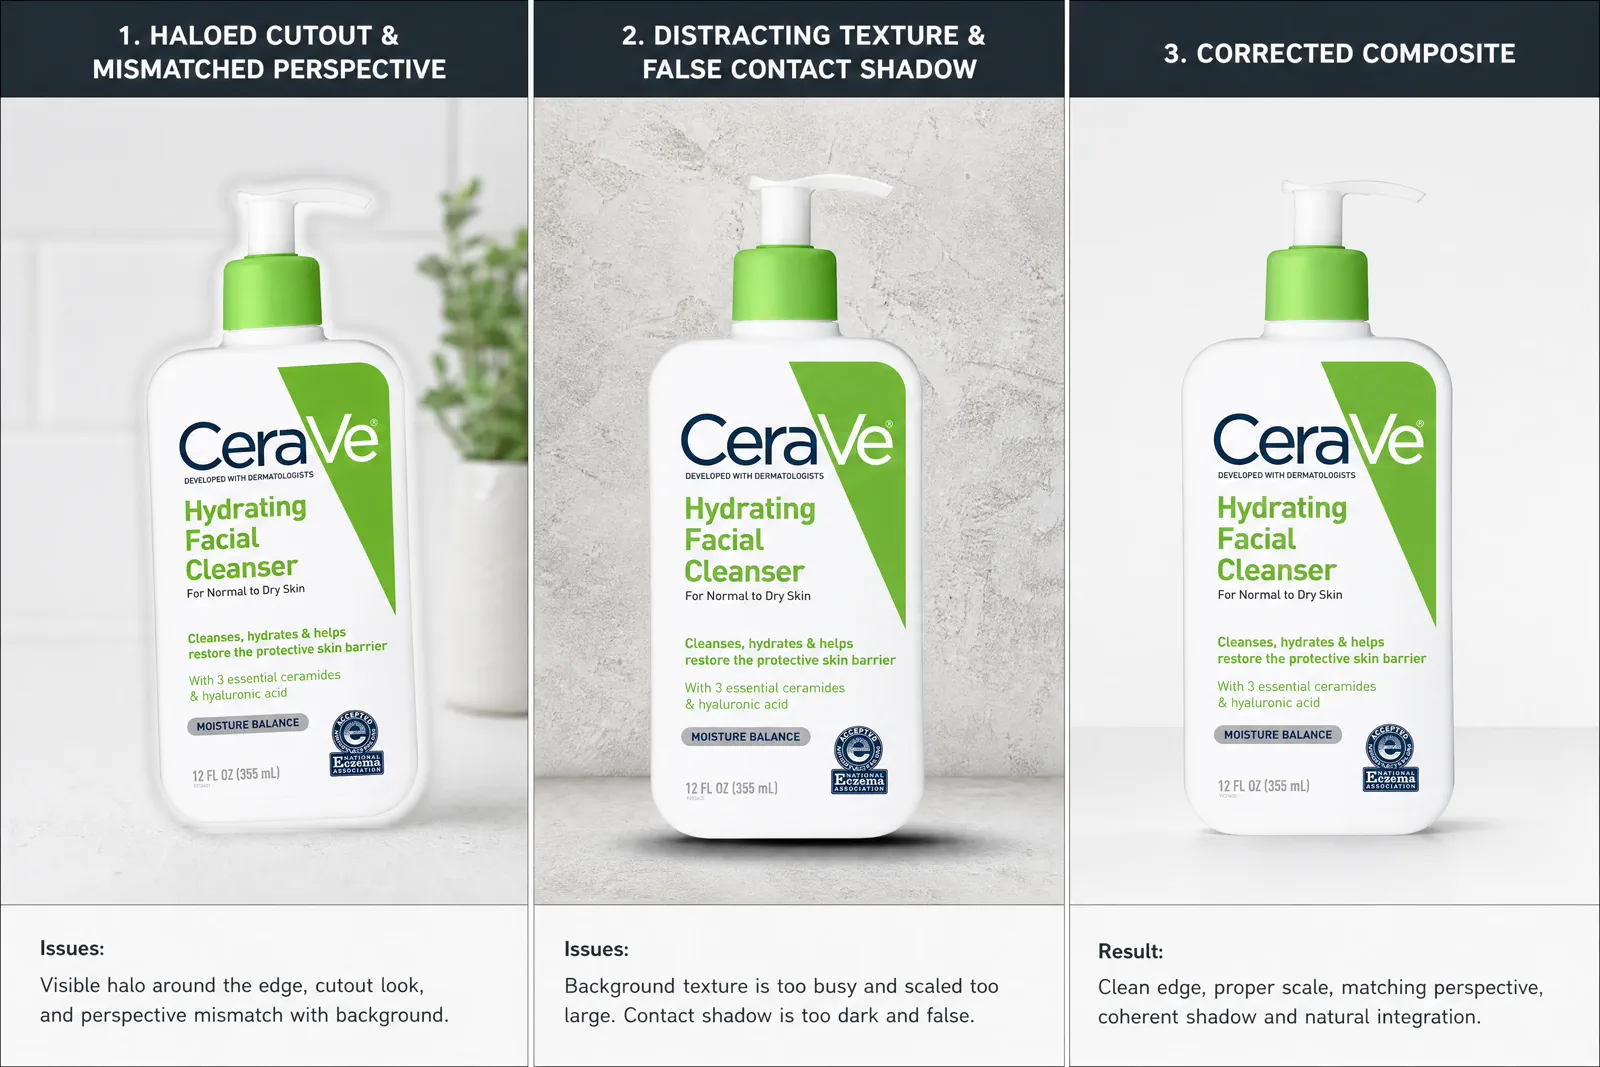
| Construction method | Useful strengths | Key controls | Final check |
|---|---|---|---|
| Physical background | Natural contact, shared light and repeatable camera views when the set is controlled. | Storage, set size, wear, reset time and material handling. | Confirm that the background covers the crop cleanly and that its scale and texture support the product. |
| Generated scene | Fast exploration of multiple contextual or brand directions from an approved source. | Keep product identity, geometry, label, edges, lighting, and contact consistent with the source. | Before use, compare with the source image and confirm product scale, label, contact, and reflections. |
| Composited background | Precise control over a selected plate and deliberate layout. | Mask quality, perspective, depth of field, color, shadow and usage rights. | Confirm that edges, contact shadow, perspective, and light direction align across the full composition. |
This is a workflow comparison, not a ranking of image quality. Keep the source and production lineage with the approved result.
06 · System approval
Turn an approved background into a repeatable system
A single polished frame is not enough for a catalog. Record the rules and test the difficult products before scaling.
Define the image role
Name the placement, required crops, safe area and whether the frame is for identification, feature evidence, context or campaign use.
Define the visual constants
Record background tone or asset, horizon, texture scale, product scale, camera angle, contact shadow and negative-space rules.
Test edge cases
Use the palest, darkest, most reflective and most transparent representative products before approving a shared system.
Check product truth
Review shape, label, color, finish, transparency, reflections and the implied product contents or use.
Check production lineage
Keep the product source, background source, production method, usage rights, and final version with the result.
Check the final crop
Approve every required placement at its real dimensions. Recheck edge clarity, product prominence and message space after cropping.
Questions that need judgment
Frequently asked questions
These answers cover the exceptions and review tests that still depend on context.
Why can a digitally replaced background look fake even with a clean cutout?
A clean edge solves only one part of integration. Compare product and background perspective, horizon, light direction, shadow softness, contact, reflection, depth of field, color and texture scale. Use the original source beside the result to see which cue changed. A product often looks pasted in because it does not share a believable floor contact or lighting environment with the background.
How do I photograph a white product on a white background without losing the edges?
Keep the background and product as separate tonal and lighting decisions. Use directional light, controlled reflected edges, a slight value difference and an appropriate contact shadow to preserve the contour. Review fine edges and product color at full size. The product does not need to be the same white value as the background, and forcing both to pure white can remove useful form.
When is a physical background more practical than a digital one?
A physical set can be practical when the same contact, camera angle, transparent material, or reflected surroundings must be repeated across many views. A digital or generated approach is especially useful when you need more scene variety, faster iteration, or freedom from storage and set-size limits. Compare turnaround, repeatability, source-image quality, usage rights, and the number of required outputs.
Change the scene without reshooting
Give the same product a background built to sell
Start with one clear product photo. Move from a clean product-page background to a lifestyle setting or campaign look in Adyvi—without rebuilding and reshooting every physical set.
Create a new background for my product